 |
| Photo by Tiffany Anderson |
So, it's about time that I shared some of the details from the big day with you!
Because we got married at Dead Horse Point State Park, we had some limitations on the plants and flowers we could use in our decorations, bouquets and boutonnieres.
Basically, we had to use native plants only. Problem is, Moab is a desert. Not a lot of variety in the vegetation down there, especially in October.
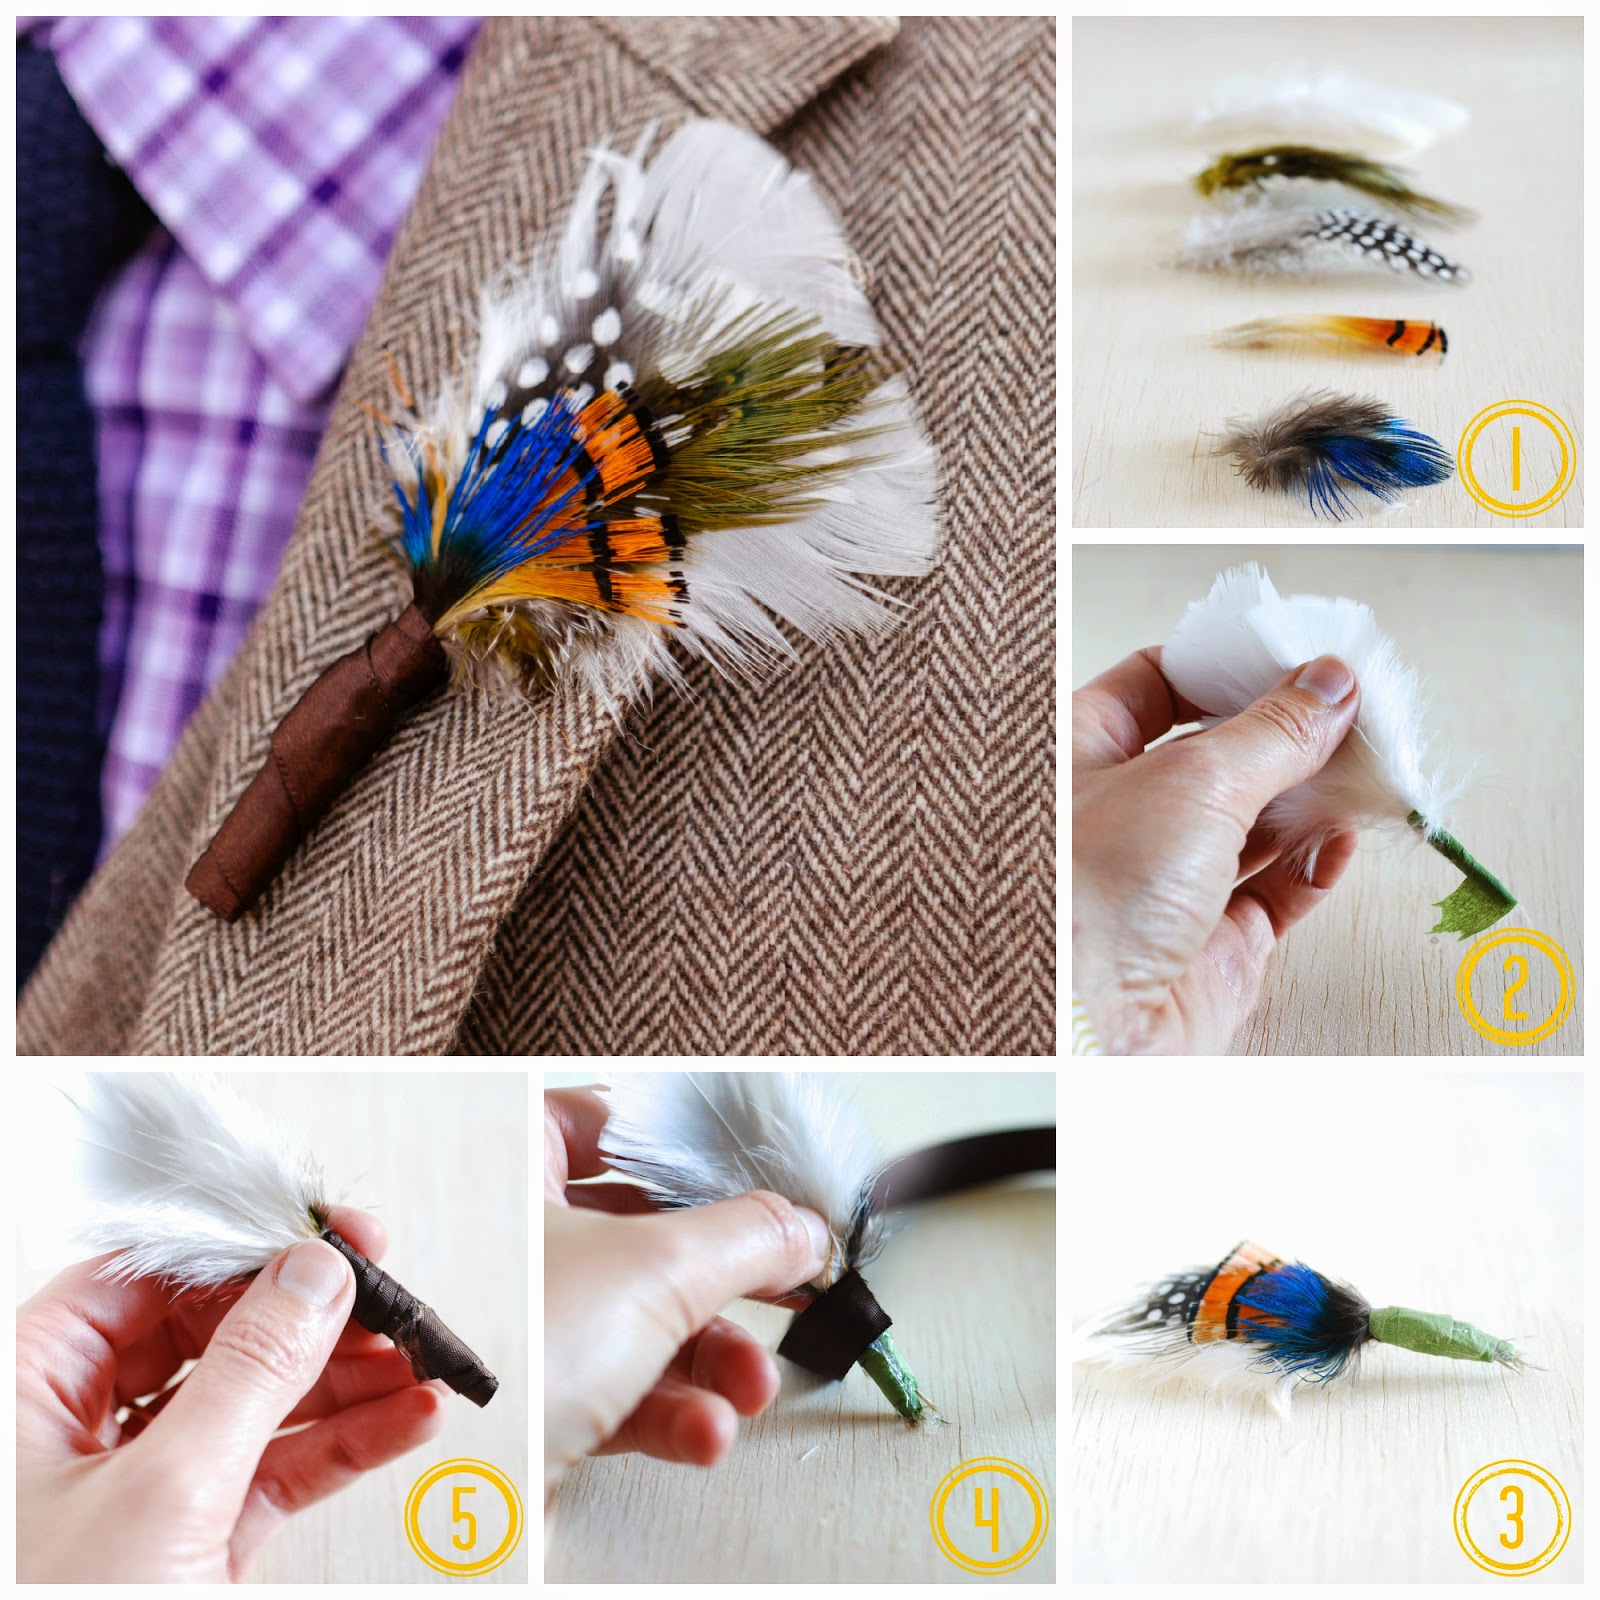
But when life hands you a super dry, desolate (beautiful) venue, you make your boutonnieres out of feathers and they are just as pretty. Plus, they last forever.
DIY FEATHER BOUTONNIERES
What you need:
assortment of feathers (we got ours from a fly fishing shop)
floral stem tape
ribbon (1/4 inch thick)
hot glue gun and glue
straight pins for attaching to the lapel
1. Figure out what feathers you are going to use and arrange them so you know which order you will assemble your boutonnieres. I put mine in the order from tallest to shortest which happened to be the order I wanted the colors, but you can play around with them. Just know that you will need the space to wrap the bases.
2. Start with your base color and wrap the feather(s) bases with the floral stem tape. Wrap this tightly so the feathers stay together.
3. Keep adding more feathers, wrapping after each color/type. This will help to keep the feathers secure.
4. Place a dot of hot glue on the back of the boutonniere at the point where the tape and exposed feathers meet.
5. Wrap the ribbon around the base covering all of the tape then secure with another dot of hot glue on the back of the boutonniere. Cut off any excess ribbon.
6. Press the straight pin through about a 1/2 inch of the ribbon on the back side then attach into the lapel of the jacket.


No comments:
Post a Comment